While growing up, I remember my father used to grow an ornamental plant called “elephant ears” or “keladis” in our garden. I hated the sight of it, just because aesthetically, the huge dark green or purple leaves looked overgrown and huge, hideously ugly (in my opinion) and totally out of place in a garden bright with gorgeous balsam blooms in every color one can imagine. In fact, I have memories of wild keladis growing along railway lines in many parts of northern India. How I wished I could just rip them out of the soil and dispose of them permanently. Then, around the time of monsoons, a delightful root vegetable called arbi (colocasia) would suddenly appear in the local subzi mandi (farmer’s market). My father took me once with him and I nearly had a fit when he asked the hawker to weigh and pack half a kilo of elephant ears and a kilo of a funny looking root vegetable. Little did I know then that the edible colocasia and the ornamental keladis belonged to the same genus. Needless to say that my mind was made up not to touch colocasia when my mother cooked it. It looked disgusting!!
The same evening, my mother made steamed and fried fritters out of the leaves (pathorhe) using gram flour and spices. It looked crunchy and delicious. Hesitantly, I tried a small piece. It was delicious!! I suspected it was made out of the elephant ears my father had bought, but I was too afraid to ask and confirm, should my distaste overwhelm my liking for this new found snack my mother had made. A couple of days later she made a deep fried side dish out of the roots by boiling and slicing them first. I still remember how we kids pounced on it, hardly leaving any for her. That day she converted me, and gave a new meaning to the proverb – don’t judge a book by it’s cover. While I still don’t care to plant elephant ears in my garden to date, I do make it a point to buy colocasia whenever I find it in our local global food mart. The variety of colocasia that we get here is quite different than what we get in India. The roots are a lot firmer, and despite boiling them well, they don’t get overdone and mushy, which I realized was a good thing, and bad! The upside was that peeling the skin off after boiling is a breeze, but the downside is that the root is not very soft and needs to be cooked for a little bit longer to made it soft enough to eat.
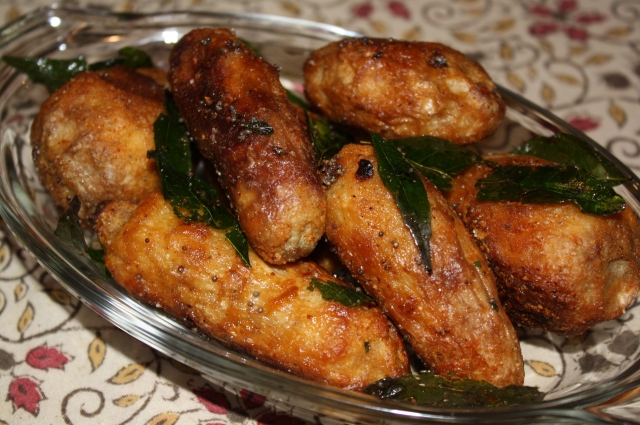
Earlier I used to cook it the way my mother made it – by boiling colocasia in a pressure cooker, peeling the skin off, slicing them into 1/2 inch discs, deep frying them in hot oil, and seasoning with just salt, black or red pepper, and a pinch of asafoetida. Over the years, I’ve gotten more health conscious and try to modify the cooking process as much as possible without compromising the taste too much. This recipe is very low fat, and while it doesn’t taste deep fried, it still has some crispness to it. My children who are picky when it comes to something new even went for second helpings. I have tried two versions – sliced and whole colocasia and prefer the latter due to the least consumption of oil. For entertaining though, I would definitely slice them. After all, a little bit more oil is a better option than a loadful!
Ingredients
(serves 4-6)
- 8 colocasia roots
- 1 tsp salt (or to taste)
- 1-2 tsps oil for coating (I use cooking spray)
- ½ tsp red chili powder
- ½ tsp mustard seeds
- 1 sprig of curry leaves
- 1 tsp oil for tempering
- pinch of asafoetida
Method
Boil the colocasia roots in a pressure cooker till well cooked but not mushy. You can test whether the root has been cooked by piercing it with a knife. I usually find it a pain to pressure boil vegetables. So I popped all the roots in a microwaveable plastic bag, made a knot and ran it on high for about 10 minutes, checking first at 5 minutes, then every 2 minutes thereafter. Let the colocasia cool down before peeling. The skin comes off in a breeze. At this point it is up to you to leave the roots intact, or cut them in half or ½ cm slices. Remember that the smaller you cut them, more the oil consumption. In a large bowl, take 1-2 tsp of oil, salt, red chili, and colocasia and mix to thoroughly coat each piece. Leave aside for the flavors to penetrate for about 30 mins. Preheat oven to 375 ºF. Place in a single layer on an aluminum foil lined tray or oven safe dish. Bake for about 30 minutes, turning over every 10 minutes. If the colocasia seems to dry out, spray with a little cooking spray. Baking ensures complete cooking before charring under a broiler. Turn the broiler on and broil for an additional 10 minutes or till all sides are brown and crisp.
Now in a small pan, add 1 tsp of oil and heat. Add mustard seeds to splutter, followed by curry leaves and asafetida. Once the curly leaves are crisp, toss in the colocasia and stir to coat. Dress up with more salt and red chili powder if required. Serve as a side dish to rice and dal.

